By Douglas J. Burgasser
Archive for the ‘Warren Engineering’ Category
Moss Build-Up on Roofs
Wednesday, September 19th, 2012Finished Basements
Wednesday, September 19th, 2012More Than Just Vinyl – The Pros and Cons of Common Siding Materials
Wednesday, September 19th, 2012By Douglas J. Burgasser
Siding is the exterior cladding of a house that acts as the cosmetic finish and the first barrier against wind and water. Almost any material can be used as siding. Let’s talk about some of the common exterior siding materials that we see on homes in the Rochester area.
WOOD
Traditionally, for many generations, one of the preferred exterior siding materials has been wood. Whether it is wood shingles or wood siding, wood has proven to be a reliable and durable exterior siding material.
Primarily, wood siding and wood shingles are made either of pine or cedar. If it is kept properly painted or stained, a wood exterior can last for many generations. Some grades of cedar can even be left exposed to the weather and perform well. Of course, wood materials require exterior maintenance and most wood will weather and decay if not properly maintained. Homeowners must regularly caulk, scrape, and paint or stain the wood. In addition, wood exteriors are a natural material and are more prone to infestation from nature’s pests; including carpenter ants, carpenter bees, woodpeckers, and wasps.
BRICK

It’s pretty hard to beat the durability of a brick home. Brick is timeless and attractive. There are relatively few homes in the Rochester area whose exterior is entirely brick. On the other hand, there are many homes with brick facades on the front of the house.
Brick exteriors require very little, or infrequent, maintenance. Sometimes, re-pointing (re-mortaring of loose mortar joints) becomes necessary. If a soft brick was used, a few bricks could need to be replaced due to spalling or other wear. Overall, the advantages of a brick exterior are durability and low maintenance. Another advantage to brick is that it does have superior sound and wind insulation characteristics.
There are a few disadvantages of a brick exterior. First, brick is a relatively expensive material as compared to other more plentiful siding materials. The higher costs are due to both the cost of the material, as well as the labor costs associated with installation. Another drawback to brick would be that you cannot change its color or appearance once the initial choice is made, although painting brick is an option and there are many painted brick homes in Rochester. Unfortunately, once any material is painted, the paint must be maintained.
ALUMINUM
Aluminum siding was really the first widely used low-maintenance siding material. Aluminum siding was made available in many colors, textures and styles. It could be applied directly over wood siding, resulting in an almost maintenance-free home. Aluminum siding is weather resistant, low-maintenance and it has a lifespan of many decades.
Of course we all know that aluminum dents. Once aluminum siding and trim is dented it is not possible to remove the dents without replacing the damaged material or fixing the dents in a similar way that dents in a car are fixed. Making matters worse, it becomes difficult to find material that will match the existing texture and dimensions of the siding. Matching the color is almost impossible. This is partially because aluminum siding will fade, affecting its color. Eventually the siding weathers and oxidizes, noticeably affecting its appearance.
It is important to understand that aluminum siding can be painted. Of course, as is the case with any painting job, proper preparation is critical. The siding must be thoroughly cleaned and prepared. If painted properly, a paint job on aluminum siding can last many years.
VINYL
In many respects vinyl siding replaced aluminum siding as the material of choice for low maintenance exteriors. Like aluminum, vinyl siding is available in numerous designs and colors. It is essentially maintenance free and it will last for generations. The advantage that vinyl siding has over aluminum is that it is not as easily damaged. Vinyl siding has some “give”. In other words, it will not easily become dented or damaged if bumped or hit by an object.
Vinyl siding also fades or discolors slightly over a period of many years. Another disadvantage is that, much like brick, it is difficult to change the appearance or color of vinyl siding once the initial material choice is made. Vinyl siding can also be painted, but this is not done very often, and proper preparation is also very critical. Vinyl siding will become brittle as time progresses, due to the exposure to the sun’s rays. This makes is more susceptible to cracking from the impact of objects. Although vinyl siding is widely utilized, some traditionalists feel that vinyl is not as desirable as a more natural wood exterior. Further, the main component in vinyl siding is petroleum (oil), and this is not considered a renewable resource, like wood.
HARDBOARD
Hardboard siding is a material that became popular around the 1970’s. It is a lower cost alternative to wood. From a
distance it appears like traditional horizontal wood siding. However, it is usually made of Masonite® and it has not proven to be nearly as durable as wood.
Hardboard siding is very susceptible to damage due to its exposure to the elements. If it is not kept meticulously painted and caulked at the edges it will suck up moisture and become swelled, softened and deteriorated. The advantage to hardboard siding is its relatively low initial cost. However, the disadvantages outweigh this cost. Hardboard exteriors require a greater amount of maintenance and they are not nearly as durable as the previously noted choices.
ASBESTOS CEMENT SHINGLES
Exterior wall shingles are not always made of wood. Asbestos-based composition shingles are quite common in the Rochester area. It is a material that has proven to be long lasting and reliable. It is a paintable material, with the ability to hold a coat of paint noticeably longer than traditional wood siding or wood shingles. In other words, homeowners do not have to repaint the exterior of their home as often.
Asbestos shingles are somewhat brittle. As a result, it is quite common to find chipped or cracked shingles on the exterior of the house. They can be easily replaced, especially if the homeowner is fortunate enough to have a few spare shingles stored in the corner of their garage. We commonly tell people that if they have a house with asbestos shingles and another house in the neighborhood is in the process of removing their asbestos shingles, they should ask their neighbor if they can have a bundle of the old shingles so that they can use them in the future to replace any damaged shingles.
The advantages of asbestos cement shingles are the long life expectancy and the weather resistance. Painting maintenance is not nearly as important as it is with wood siding or hardboard siding.
The disadvantages to this material are its brittleness. Also, the word “asbestos” strikes fear in the hearts of some. However, since this is a material that is on the exterior of the house, and since it is not a material that readily degrades, there has not been much concern regarding possible health effects of this material. It will need to be properly removed and disposed of if the owner chooses to re-side their house with an alternate material, and special precautions should technically be followed if cutting or breaking up the shingles.
FIBER CEMENT BOARD SIDING
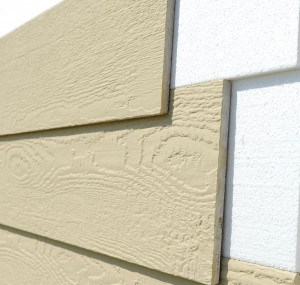
Fiber cement siding has become quite popular in recent decades. It is a siding that is composed of a combination of cellulose fibers and cement like materials. Because of the materials used in its manufacturer, fiber cement siding is popular as an environmental or “green” alternative. After all, the wood fiber in this type of siding does not come from harvested old trees. Also, the cement and sand materials that are utilized are readily available. In addition, there is a substantial life expectancy for this material, possibly exceeding fifty years.
Quite often you will hear this type of siding referred to as “HardiPlank®”. This is a brand name that to some extent has become synonymous with this material. The advantages of fiber cement siding are numerous. It is durable and long lasting, it requires minimal maintenance, and it is attractive. The downside to this material is its relative cost as compared to wood or vinyl. Also, it is relatively heavy and needs to be supported properly. Still, it is an excellent choice, judging by what we know thus far.
T-111
Basically an exterior plywood, with grooves to make it aesthetically more pleasing, T-111 siding is a low-cost, easy-to-install material. Unfortunately, like hardboard siding, T-111 must be installed properly and religiously stained and maintained to provide any significant life. The seams of the plywood do not overlap to sheet water away and, if proper trim and flashing is not installed, a lot of water will get behind the siding and damage the structure.
T-111 might be a good choice for sheds and smaller unheated structures, since it is easy to replace and repair. For a whole house, it is considered a lesser-grade material.
STUCCO (CEMENT AND EIFS)
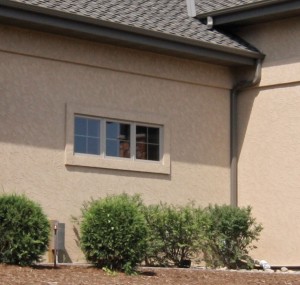
“Stucco” is a generic term used for a cement-like finish. Usually the finish will have a rough texture. Stucco comes in many forms. Old cement stucco was applied over block or over a wire mesh. This material has many of the qualities of brick, since it is a masonry finish. Keeping cracks and gaps patched and sealed is important, and once stucco is painted, it needs to keep being painted for cosmetic reasons and for greater water resistance. With unpainted stucco, choosing a contractor that can match the color and texture is important when making repairs.
Modern stucco is often referred to as “EIFS”. This stands for “exterior insulating and finishing system”. The most popular brand name for this material is “Dryvit®”. This material is used extensively for commercial buildings. If installed properly, this material is attractive and durable. However, there are many, many details of installation that must be closely followed. If not, water can get behind the siding system and become trapped. The trapped moisture can rot or rust interior wall components and lead to other water damage. Again, the choice of a qualified contractor is very important when installing or repairing this material.
ASPHALT SHINGLES
In years past, many city homes had a type of asphalt shingle siding installed. This basically consisted of a thick asphalt shingle (similar to a roofing shingle) installed over a fiberboard base shingle. Most of this siding that remains on rural and city homes is worn and old. The shingle deteriorates after many years, and the fiberboard beneath suffers water damage. Although repairs are often made, matching shingles cannot be found easily and repairs become cosmetically objectionable. Replacing this siding is the best long-term repair in most cases.
MUD (THE MUD HOUSE)
Almost every building material has been used as siding at one time or another. We even have an example of dirt used for the exterior walls of a home in the Town of Penfield. This is the known as the Mud House. Repairs to the exterior consist of getting additional mud from the property and applying over the exterior.
Hardboard shingles, fiberglass cement shingles, Teflon-coated hardboard siding, steel siding, etc.
We run into different siding materials from time to time. The above list just scratches the surface of the multitude of materials out there. If you run into a new or different material, we encourage you to call us with questions or to increase our knowledge base.
The Ins and Outs of Ductwork
Tuesday, July 10th, 2012By Douglas J. Burgasser, P.E.
We have fielded a number of questions regarding duct design for forced air heating and cooling systems. For example, people ask us how duct systems differ between modern homes and old homes. We are also asked what it means when a house is advertised as being “air conditioning ready”. This blog is intended to answer some of those questions.
First, it is important to understand that forced air heating systems were around long before air conditioning. Therefore, many older homes were constructed before there was a thought of air conditioning a home. The duct system was designed strictly to provide circulation of heated air.
In years past the prevailing thinking was that the supply runs in each of the rooms should be located towards the interior of the room, and the returns should be located at the outer perimeter of the rooms. The problem with this design is that the heated air was not provided to those areas of the room where it was needed the most, namely along the exterior walls. This resulted in less than uniform heating in the various rooms.
Thankfully, since warm air rises, the heated air tended to distribute itself throughout the majority of the house. Many old farmhouses did not have supply runs to the second floor and relied on warm air rising through transfer openings or through the stairwell. The very fact that warm air rises to the upper floors also explains why the lack of return runs on the second floor of an old house did not result in unacceptable heating of second floor rooms.
For the last 40 to 50 years residential forced air systems have been designed differently than their predecessors. Now, each room will have at least one supply run (larger rooms will have 2 or 3 supply runs), and these are located along the outer perimeter of the rooms. They are usually positioned beneath windows or near exterior doors. This is because the exterior walls, the windows and the doors represent those areas where heating (and cooling) is needed the most.
Also, in modern systems return runs are located at the interior of the major rooms. Return runs are not necessary for each and every room, but there should be a generous distribution of return runs throughout the house. Returns are usually located at a higher elevation on an interior wall.
Some builders choose to install a small number of centrally located return runs when constructing a house. These would be located in halls or central areas, rather than in the individual rooms. There are both advantages and disadvantages to this ducted return air design. This type of installation usually saves a small amount in terms of construction cost and prevents the wall cavities of the house from being negatively pressurized. Standard return air systems use return plenums in the basement and wall cavities throughout the house (not actual ductwork) to draw air back to the heating and cooling equipment. However, this can draw in unconditioned air from exterior walls and dust and dirt along baseboard floor trim. Unconditioned humid air in the wall cavities of an air conditioned home can result in mold and mildew growth in the wall cavities. On the negative side, the central ducted return air design does not allow for uniform distribution of air flow from all of the bedrooms, offices, etc.; especially during the air conditioning season.
It is more difficult to cool a house than it is to heat a house. This is because cold air is heavier, and it does not naturally rise up through a house. Instead, cool or cold air needs to be forced into the various rooms and air needs to be circulated through the rooms. Further, the primary sources of heat during the summer are the windows and warm ceilings near the attic on the upper floors of a house. This is why it is more difficult to cool a second floor, and it is also the reason why the location and distribution of return runs becomes more important. Placing the returns at a high elevation in the various rooms (especially on the upper-most floors) allows for warmer air to be drawn off the upper portion of the room during the cooling cycle. This allows for much more uniform air flow, and more uniform cooling.
Some builders will even go so far as to install returns at the floor level and near the ceiling level in the major rooms. This is very beneficial. The lower returns can be opened in the winter. The high returns are used in the summer (usually by closing a damper in the low returns) so that the warm air is drawn off the top of the room. This is a desirable design.
Oftentimes you will hear that a house that does not have an air conditioning system is “air conditioning ready”. All that this typically means is that the duct system is a modern duct system, with a generous number of supplies and returns throughout the house. Essentially, any modern home with a forced air system should be “air conditioning ready”. Sometimes a plenum or coil will already be installed in the ductwork above the furnace as well, such that the system is ready for an outdoor condenser/compressor unit (air conditioner) to be piped to the coil.
If you are looking for ways to decrease temperature differences throughout the house during the summer, it is a good idea to operate the fan or blower on your cooling system continuously during the air conditioning season, rather than only when the air conditioner is actually operating. This allows for greater air circulation rates and more uniform temperatures throughout the house.
Since cold air is more difficult to distribute throughout the house than warm air, it is beneficial to adjust the dampers on the duct system accordingly, depending on the season. Dampers that feed the second floor rooms should be fully open during the cooling season. Dampers that are located in the branches for the first floor rooms can be partially closed. This combination allows for more air flow to the second floor. Since warm air naturally rises to the second floor it can be beneficial to partially close the dampers for the second floor heat runs and fully open the dampers for the first floor heat runs during the heating season. Similarly, if looking for ways to cool the second floor better, you can block off or close a few returns on the first floor during the summer to force more of the warm air near the ceilings of the second floor back to the air conditioning equipment.
In most cases the dampers for the supply duct branches can be easily accessed from the basement space. The following photographs show examples of the dampers in the opened and closed positions. Care should be taken not to close too many of the dampers and you should start with all dampers fully open. If closing too many dampers, the air flow through the system can be reduced and this can cause problems in terms of frozen air conditioning coils or overheating heat exchangers. A heating contractor can check for adequate air flow as part of annual servicing and can help you balance the system optimally.
Windows – To Replace or Not To Replace? That is the Question!
Wednesday, June 13th, 2012Continuous radio, television and newspaper advertisements tout the advantages of replacing your old, drafty windows with new energy-efficient windows. You can call a company to come to your house tomorrow to tell you the advantages of window replacement and provide you with a quotation. What should you do?
Like any equipment replacement decision, the answer regarding window replacement is not black and white. There are many factors that go into this decision:
• Do I want to replace my windows strictly for energy efficiency?
• How efficient are my windows now?
• Can I improve the efficiency of my existing windows in a cost effective manner?
• Do I want to replace windows for comfort more than energy efficiency?
• Are my windows difficult to maintain?
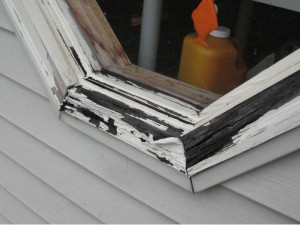
• Do my windows need a lot of deferred maintenance?
• Am I concerned about lead paint hazards of old windows?
• Do I need new storm windows if I do not replace my windows?
• Are my windows aesthetically pleasing?
• Do my existing windows add to or detract from the value of my home?
• Do I live in a preservation district that restricts types of replacement windows?
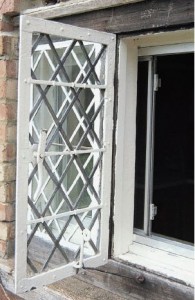
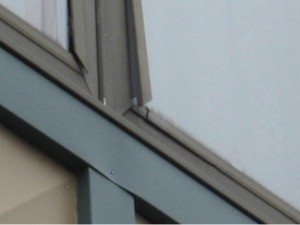
Older windows require varying amounts of maintenance and repair, but many can be difficult to replace in terms of their aesthetic appeal
All of the above (and more) can factor into the decision making process. However, there is some hard data that gets lost in the sales pitch that you need to consider.
Existing windows can vary widely in their insulating qualities and energy efficiency. Window qualities to consider from an energy efficiency standpoint include:
• The insulating efficiency, or U-factor
• The “tightness” of the window to stop drafts (infiltration).
• The shading qualities to reduce heat gain.
Since the number of run-hours for air conditioning systems in our region varies widely, and the typical annual cost of air conditioning a home is far less than the heating cost, the first two qualities (U-factor and “tightness”) are the most critical properties. The comparison of existing windows to replacement windows, in terms of energy savings, should focus on the window qualities that affect the cost of heating your home.
For years, many publications, including those from ASHRAE (the American Society of Heating, Refrigeration, and Air Conditioning Engineers) stated that a well-sealed single pane window with a good storm window is just as energy efficient as a standard grade double-pane window. The problem is, most old windows are not well-sealed or well-maintained, and this is also true of the storm window.
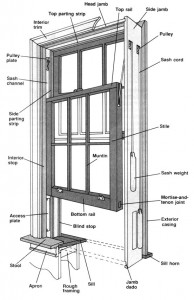
Older, existing windows have many parts, but they can be maintained for many years
The Efficient Windows Collaborative (www.efficientwindows.org) is an organization of window manufacturers. This organization promotes new windows and the related benefits, along with maintaining industry standards. On their web site, they have a case study for an existing home in Buffalo, NY. Part of the case study is shown below.
The case study basically points out that by going from a “Case 1” lower performing double pane window (which a single pane window with a storm could be considered basically equivalent) to a high-performance “Case 6” window, the house will reduce heating costs by approximately $300 per year. This is for a house that probably has 20 or more windows. The cost to replace that many windows would probably be in the range of at least $8,000 to $15,000 (assuming $400 to $600 per window for 20 to 25 windows). This translates to a simple economic payback of 26 to 50 years!
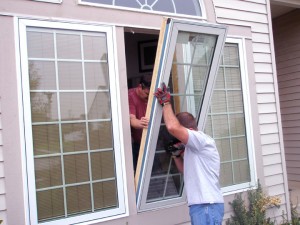
Proper windows replacement in many homes requires the labor of a skilled contractor
To be fair, there is almost always a cost to bringing the existing windows up to a level of efficiency equivalent to a “Case 1” window. But the cost of that improvement results in immediate corresponding energy savings as well; especially in terms of reducing leakage (infiltration). Caulking, weather stripping, and repair/replacement of storm windows are the costs that should first be evaluated and compared to the costs of window replacement.
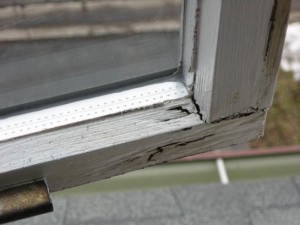
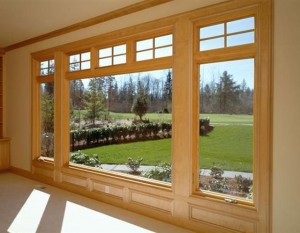
Examples of “modern” windows that are good candidates for repair or replacement
Beyond the issue of energy savings, in some cases window replacement can significantly add to the resale value of a home. According to Remodeling Magazine’s annual Cost vs. Value Report, you can recoup more than 75% of the window replacement project cost in added home value. The link to specific Rochester, NY data is: www.remodeling.hw.net/2009/costvsvalue/division/middle-atlantic/city/rochester–ny.aspx
Of course, this is an organization that promotes remodeling and they are publishing financial estimates regarding the great value of such remodeling. The value added is difficult to quantify and will vary widely based on the location of the house, market conditions, the condition of the existing windows, and other factors.
New windows can add significant value to a home, but at a significant cost
As with any home improvement, there are many factors to consider when thinking about replacing or restoring windows. From a strict energy savings standpoint, most window replacements are not justified. However, when energy savings is combined with added value to the home, elimination of lead paint, increased comfort, and other factors, replacement can often be justified.
As always, please do not hesitate to contact our office if we can be of any assistance in this regard, or in regard to other issues related to home inspections.
Piping
Thursday, April 26th, 2012SUPPLY PIPING
Prior to the 1940s the majority of residential supply piping was galvanized steel. This is a very durable pipe that can last for generations. In the late 1930s, and especially post-World War II, copper supply piping became the industry standard. In the 1970s there was increased use of various types of plastic piping. However, copper piping has continued to be the material of choice for most traditional plumbing contractors to this day.
I
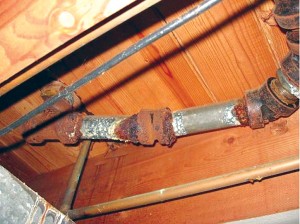
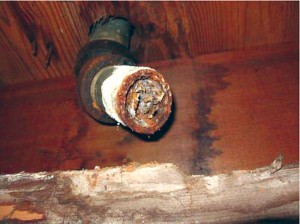
Although galvanized pipe is very durable, it eventually begins to rust, and ultimately leak. The other downfall to galvanized pipe is the eventual build-up of sediment or corrosion inside the pipe. This results in a “hardening of the arteries” affect, eventually adversely affecting water flow and water pressure. For this reason replacement of galvanized piping with copper usually results in an increase in pressure.
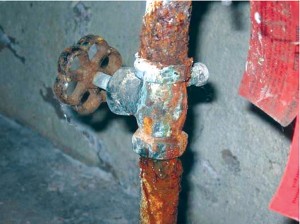
Rusty and leaking galvanized pipe
Partially plugged old galvanized pipe
Copper pipe with soldered fittings does not rust or deteriorate in the same manner as galvanized pipe. Also, it is not prone to restricted flow from eventual build-up in the pipe. These qualities have made copper supply piping desirable for generations.
I
Plastic supply piping has become popular greatly because the cost of copper pipe has increased. The most common type of plastic pipe in earlier years was CPVC (chlorinated poly vinyl chloride). The joints of this piping are glued together. It provides for a less costly alternative to copper, but it is less durable or reliable.
I
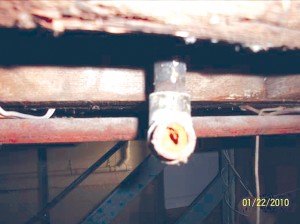
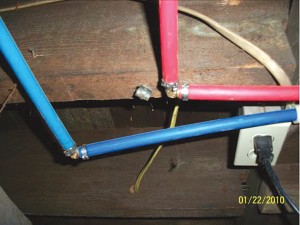
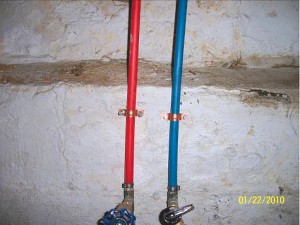
The most modern type of “plastic” pipe is PEX (cross-linked polyethelyne). This is the color coded blue and red pipe that has prompted many of your inquiries as of late. The early returns on this type of piping have been very positive. Plumbing contractors in general have praised the cost benefits, ease of use and dependability of this pipe.
PEX supply piping with clamped fittings
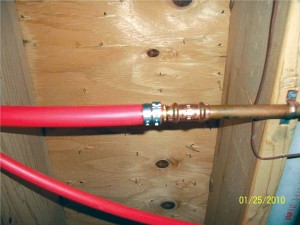
PEX piping connected to copper
I
PEX piping can be used in two ways. Sections of the pipe can be joined or connected in a similar design to that of galvanized or copper pipes with elbows, “T”s, etc. The joints are rigidly clamped together (galvanized pipes have threaded fittings while copper pipes have soldered fittings).
I
PEX piping can also be used in a “manifold” design. The manifold is located in the basement, near the main water service. This manifold feeds individual hot and cold pipes that seperately run from the manifold to each fixture in the house. This type of system greatly minimizes the number of joints or connections in the plumbing system. There is a single pipe feeding each fixture directly from the manifold to the individual fixture. Since plumbing problems often times occur at the joints or connections, a manifold system can theoretically reduce the number of problems that might be experienced as time passes. Also, the joints of PEX piping restrict flow and reduce the pressure. Manifold systems result in more uniform pressures to the various plumbing fixtures in the house. Although manifold systems are not the norm, we have inspected a number of modern homes with this type of system.
WASTE PIPES
Similar to supply piping, waste piping has also evolved over the years. Steel or cast pipes were used for decades in the early to mid-1900s. Much like its supply counterpart this type of piping was durable and reliable, but was also prone to eventual rusting and leaking. These pipes can become restricted or plugged.
Inside of old galvanized drain
I
Cast iron waste piping was primarily used on the larger piping (3” and greater) and is less prone to corrosion, as compared to galvanized piping. This waste piping is still used commercially; especially underground.
I
Copper waste pipe was used in the late 1950s to the early 1960s. This piping is very dependable, but it is cost prohibitive and somewhat labor-intensive when soldering large joints.
I
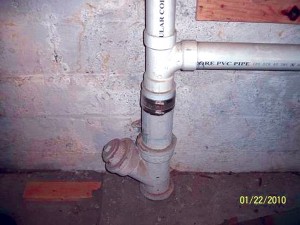
In the early 1970s “plastic” or PVC drain pipe became the norm for residential use. This remains the case to this day. PVC drains are durable, reliable and do not tend to be prone to unusual restrictions or blockages. Most PVC drain piping is glued at its fittings. These connections are very dependable and are not prone to leakage. Threaded couplers are also used on plastic or PVC drain pipes for traps and drain connections. As a result, traps and drain extensions are very easy to clean and replace on an as needed basis.
PVC Drain connected to older cast drain cleanout at floor level
I
We hope that you find this information to be beneficial, and that it helps answer some of the questions that you may have on this topic. As is always the case, please do not hesitate to contact our office if we can be of any assistance.
The Differences Between Engineering Inspections And Code Compliance Inspections
Wednesday, March 14th, 2012By Douglas Burgasser
We have had numerous instances where clients and/or realtors have asked us whether a house that we are inspecting conforms with codes. Home buyers sometimes confuse our inspections with code compliance inspections.
Pre-purchase engineering inspections of houses or buildings are not code compliance inspections. Such an inspection is considered to be well beyond the scope of a building inspection as defined by the professional standards that govern home inspections. By law, the local building department inspector (Code Enforcement Officer) has almost the final say in interpreting and applying codes. Although we can sometimes comment on the applicable codes, the final determination must be the local CEO.
More importantly, it is critical to understand that existing homes will rarely conform to modern building codes and standards. This is because building codes are revised on a regular basis. As a result, today’s code would be different than the code that was in place when an existing home was constructed. The code at the time that the work (construction, repair, or improvement) was performed is the code that applies. There is also no requirement that existing homes conform to today’s codes and standards. Certainly, any renovation or repair work that is performed on an existing home must be performed in a manner that conforms to today’s standards. We offer the three examples below:
Modern electrical codes dictate that electrical outlets in “potentially wet locations” be protected by ground fault interrupter protection. These locations would include some kitchen outlets, bath outlets, exterior outlets, pool equipment, etc. However, if a house was built in the 1950s it may not have ground fault protection for a bathroom outlet. There is no requirement that ground fault protection be installed. If this same bathroom were to be renovated the electrician who is performing the work would be obligated to install ground fault protection at the time of renovation. Today’s codes apply to the new work that is currently being performed.
Another example would be entry doors that separate a house from an attached garage. Modern codes for new work dictate that the door leading from the house to the garage must be a fire-rated door (usually metal) with a metal jamb. Also, a self-closing hinge is required for the door. This would prevent the door from being left open. The purpose of this code is to help prevent a fire from easily spreading from the garage to the interior of the house. If an existing house built in the 1940s has an attached garage, and the door leading to the garage is not a fire-rated door the homeowner is not be required to replace the door. However, if they chose to replace the door, their obligation would be to utilize a door that conforms to current codes.
A third example would be that of automatic garage door openers. For a number of years new automatic garage door openers have been required to have redundant safety reverse features. This means that the door will reverse if it meets an obstruction or hits an object during the downward motion. Also, new openers must have an electronic eye safety reverse. This makes the door reverse if the electric eye (or safety beam) is crossed when the door is in the downward motion. Of course, there are many old openers still in use that would not conform to these standards. There is not a requirement that these openers be replaced. The requirement would apply to openers that are currently manufactured and installed.
Homeowners should also understand that overzealous contractors will tend to overstate the necessity for proposed repairs or modifications based on code requirements. Once again, homeowners should understand that in many cases work does not need to be performed strictly because an existing component does not conform to modern codes. However, it is also important to understand that codes have mostly been established in the interest of safety. As a result, homeowners should consider modifications as an improvement and for the benefit of increased safety in their home and to the occupants.
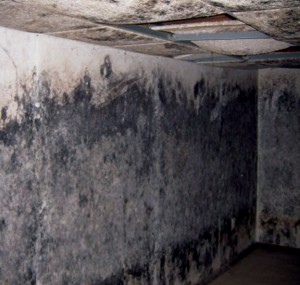
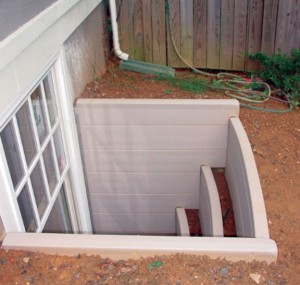
On a related topic we have also seen an increased concern for finished basement space. Fire and safety codes that have been in place for decades dictate that basement space cannot be considered living space without a second means of egress. Since the mid 1980’s, finished rooms in a basement are only permitted if there are two exit points. The stairs leading into the basement would be one exit point. The second egress is usually an appropriately sized window or a door. There are also definite requirements that dictate whether a window would be an acceptable means of emergency egress. The window must be a certain minimum size (width, depth and square footage of opening), and the bottom of the window cannot be more than 44 inches from the basement floor.
A basement level bedroom must be equipped with its own means of egress. In other words, if a house has a finished basement that includes two bedrooms there must be an egress window or door from each of the bedrooms.
We hope that this brief explanation provides some clarity to the questions surrounding code issues and finished basement spaces. Please do not hesitate to contact our office or any of our engineers if you have any questions in this regard.
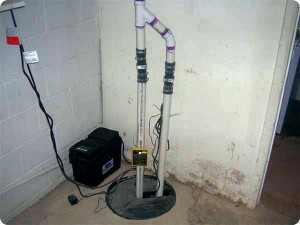
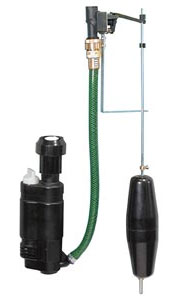
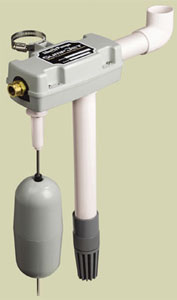
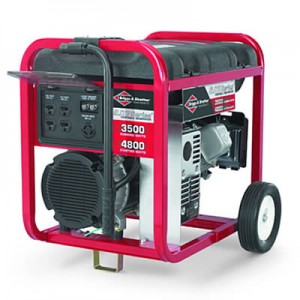
Back Up Sump Pumps
Wednesday, March 14th, 2012By Thomas Wurzer, P.E.
Residential Humidifiers
Friday, January 6th, 2012By Douglas Burgasser
Residential humidifiers have gained a great deal of popularity in recent years. They have become quite common in houses that are heated with forced air heating systems. Unfortunately, many homeowners do not understand how their humidifier works, how is gets adjusted, and how it should be maintained. Some homeowners might not even realize they have a central humidifier.
TYPICAL MODERN HUMIDIFIER
As you are probably aware, indoor air tends to be somewhat dry during the winter season in the Rochester area. This is because it is cold and dry outside. As a result, it is beneficial to introduce some moisture or humidity into the living space. This can be accomplished through the use of a standard air humidifier that is installed on a forced air heating system.
Older style humidifiers consisted of a sponge-like media material that was mounted on a drum or wheel. A small motor turned the wheel, allowing the media to become saturated as it passed through a small basin of water. Air from the heating system passed through the humidifier, introducing moisture to the air. This style humidifier tended to be problematic since it relied on the operation of a small motor and a small float valve. Also, there was constantly a basin of standing water, which eventually would become dirty and filled with mineral deposits.
The following photos show various old style humidifiers, the last of which is leaking:
PAD STYLE
OLD DRUM STYLE
BRUSH STYLE
OLD APRILAIRE
LEAKING DRUM HUMIDIFIER
Modern style humidifiers are simple devices. They consist of a water supply (controlled by an electric solenoid valve) which trickles water through a “water panel”. As is the case with the older style humidifiers, moisture is introduced to the air as it passes through the humidifier. However, with these modern units, excess water is immediately drained out of the system. As a result, the maintenance on these systems is minimal. The water panel should be replaced annually.
WATER FLOW INTO HUMIDIFIER
Humidifiers operate automatically. They are controlled by humidistats. A homeowner simply needs to adjust the humidistat to their desired humidity level. Humidifiers are typically wired so that they will only operate during the heating cycle. The humidifier will then function if the humidity level of the air in the house is lower than the setting on the humidistat.
People often ask us how they should set their humidistat. A good starting point would be between 30% and 35 % humidity. If a homeowner finds that the inside of the house feels somewhat damp or that there tends to be condensation formation on the windows, they should decrease the setting on the humidistat. Care should be taken to not over-use a humidifier. Excessive amounts of moisture in a house can lead to problems from excess condensation. On the other hand, if the indoor air tends to be too dry (or if a person is being “shocked” as they walk around the house in their stocking feet) the humidistat should be turned up.
HUMIDISTAT
In general, as severely cold temperatures are reached outdoors (such as -20F), the humidifier setting should be changed from 35% to 25% or 15%, to prevent excessive condensation on windows, walls and other surfaces.
The water panel in the humidifier should be changed once each year as maintenance. Sometimes, when the winter is not too cold and dry, the panel can last two years before changing it. Excess minerals in the humidifier can be cleaned out with a solution of white vinegar and then water.
CLEAN WATER PANEL
BUILD-UP OF DEBRIS ON WATER PANEL
VERY DIRTY WATER PANEL!
On most humidifiers or the connected ductwork there is a bypass damper. This damper should be opened during the winter to allow air through the humidifier. In the summer, if you have central air conditioning, the damper should be closed to save fan energy and to get the most out of your air conditioning system.
DAMPER OPEN (WINTER)
DAMPER CLOSED (SUMMER)
Humidifiers, when used properly, can make occupants more comfortable at slightly lower temperatures. This can reduce the thermostat setting and reduce heating costs.
We trust that this brief explanation will provide you with some valuable information regarding the use of a central humidifier in your home.
As is always the case, please do not hesitate to contact our office if we can be of any assistance regarding this topic, or other topics related to your house.
Furnace Filters
Wednesday, October 19th, 2011By Tom Wurzer Warren Engineering
Homebuyers frequently ask us questions about furnace filters.
• How often should I change my filter?
• What type of filter is the best one to use?
• My kids have allergies. What filter should I use?
• Are electronic air cleaners superior to standard filters?
The Purpose of the Filter
The furnace filter is a critical component of a forced air heating and/or air conditioning system. The primary purpose of the filter is to protect the mechanical equipment (i.e. the furnace fan, the heat exchanger, the air conditioning evaporator coil, etc.). The filter prevents dust and debris from entering the equipment and it is located on the return air side of the system. It is the first component of the system that the air from the house goes through.
Diagram shows the position of the filter to the left of the fan
Many allergists will recommend better, high-efficiency filters for your furnace to try and reduce dust, pollen and other allergens in the home. There is very little evidence that a better filter will reduce allergens in the home. It may slightly reduce the number of smaller sized particles, but most sources do not report that it will reduce dust in the home. Regular vacuuming with a high-quality vacuum and general good housekeeping provide greater benefits in this regard.
Frozen air conditioning coil
If the filter is not maintained and changed or cleaned at proper intervals, the heating and cooling equipment can be damaged. A dirty filter will reduce the amount of air that flows through the system. This will reduce the efficiency of the system and increase utility costs. If the air flow is blocked too much, the filter can collapse. Low air flow can lead to excessive heat and premature cracks in the heat exchanger, frozen air conditioning coils, and other equipment problems.
Extremely dirty furnace filter
Types of Filters
When furnaces come from the factory, many come with a filter. These are typically low-efficiency washable filters that are meant to keep large construction dust and debris out of the unit. These are often referred to as “construction filters”. Although you can continue to wash and use these, we typically recommend removing them after construction or renovation is complete. Replacement with a higher efficiency filter that removes smaller dust particles is typically recommended.
Examples of washable filters that come with some furnaces
Standard residential furnace and air conditioner filters are typically one-inch thick and with varying dimensions for width and height. Typical sizes include 16”x24”x1” or 16”x20”x1”, but there are many, many sizes. With the ease of today’s internet shopping, one can quickly search on-line for retailers that carry the specific filter size that you need.
Standard filters typically range from what is known as a 30-day filter, to a 90-day filter. Flat fiberglass filters are usually the 30-day type. If homeowners are religious about changing their filters, these can work adequately. However, the pleated 90-day filters allow more room for error, in terms of forgetting to change the filter at regular intervals. The greater surface area created by a pleated filter actually reduces the pressure drop through the filter, as opposed to a flat filter. The pleated filter can hold more dust and dirt prior to needing a change.
For even more surface area, thick pleated filters are used. Typical brands include Air Bear®, Space Guard®, Aprilaire®, Honeywell®, Skuttle®, and more. With the increased surface area of a 4 or 5-inch thick pleated filter, the filter material can be a tighter weave that removes smaller particles. This greater surface area allows the filter to only require a change every 12 months under typical operation and every 6 months if running the fan continuously.
Examples of clean and dirty thick pleated filters
During the 1980’s and 1990’s, electronic air cleaners (also called electrostatic precipitators) gained popularity. Relatively few of these filters exist today. They are considered relatively ineffective as filtration devices. Once the metal plates in these units are dirty, most dust and dirt passes right through them, into the furnace. Further, these devices generate non-adjustable levels of ozone. This could be an irritant to people with asthma, and there is debate regarding whether or not ozone could be a carcinogen. We typically recommend replacing the pre-filters and filter cells in these older electronic air cleaners with a thick pleated filter designed to fit on the same housing.
There are some newer electronic air filters on the market with more measurable ozone generation levels that use a combination of washable filters and electronic grids to filter the air. These are still relatively rare in the marketplace and the jury is still out in terms of the effectiveness and reliability of these filters. They do require periodic cleaning maintenance.
Old and new style electronic filters
Filter Ratings
High efficiency thick pleated filters, and some 1-inch filters, carry an efficiency rating known as the “MERV” rating (Minimum Efficiency Reporting Value). The MERV ratings for home furnace filters vary from 1 to 16. Higher MERV ratings correspond to a greater percentage of particles captured on each pass of air through the filter. Unless engineered properly, with a greater efficiency (i.e. higher MERV rating) comes a greater pressure drop through the filter.
Low-efficiency fiberglass filters typically have MERV ratings of 4 or less. Pleated furnace filters will have MERV ratings ranging from 5 to 16. Typically, a MERV rating of 5 to 8 is adequate for most homes and brings less risk of excessive air pressure drop through the system. Higher MERV ratings of 11 to 16 can be used, but one must be sure that the filter rack or housing, and the furnace, are designed to use such filters properly. One must also be more careful to change the filter at regular intervals.
Duct build-up on furnace fan from lack of a proper filter
The Basics
In general, furnace filters exist to protect the furnace and the air conditioning coil. Minor benefits from a good filter might include a slight reduction of allergens in the home, but this is debatable. Main points to remember include:
• Make sure the furnace has a properly installed filter. Many furnaces we inspect have no filter at all, or they do not have a rack or clip to hold a filter. Many times the filter is sitting loosely in the fan cabinet and almost all of the air flowing through the furnace is bypassing the filter. Seal off gaps around filters to prevent air from bypassing the filter.
• Change the filter as frequently as recommended by the filter manufacturer. This is typically a 30-day, 90-day, 6-month, or 1-year interval. If the filter is washable, such as original furnace filters or electronic air cleaners, make sure cleaning is done at recommended intervals.
• Consider replacing older electronic air cleaning pre-filters and filter cells with a thick pleated filter. These pleated filters are actually more effective in most cases and have less maintenance associated with them.
Please do not hesitate to contact our office if we can be of assistance in this regard, or in regards to other issues related to home inspections.
